How to change your cam on your 6 cylinder OHC Falcon
How to change your cam on your 6 cylinder OHC Falcon
By John_xr6
Pictures will be up as soon as the server is ready Wink
---------------------------------------------------------------------------------
NOTE: The E-Series Owners Club and the writers of the articles take no responsibility for any damage or problems or grief that may be a result of following one of our articles. Make sure you know what you are doing, are confident and competent before commencing any activity. You do so at your own risk!
----------------------------------------------------------------------------------
Tools Required
Torque Wrench
Ratchet
Breaker Bar
7mm socket (if changing rocker covers)
10mm socket
13mm socket
17mm socket
22mm socket
Spark plug socket
Various extension bars
Screw driver
Small hammer
Shifter
Step 1
Remove all things which cross over the rocker cover and which go on it. These include: Sparkplug leads, Accelerator Cable, Cruise Control Cable(if fitted), PCV Valve Hose and Manifold Vacuum Hose (back of rocker cover) I also removed the sparkplugs, Brake booster hose and the Air Box.
Step 2
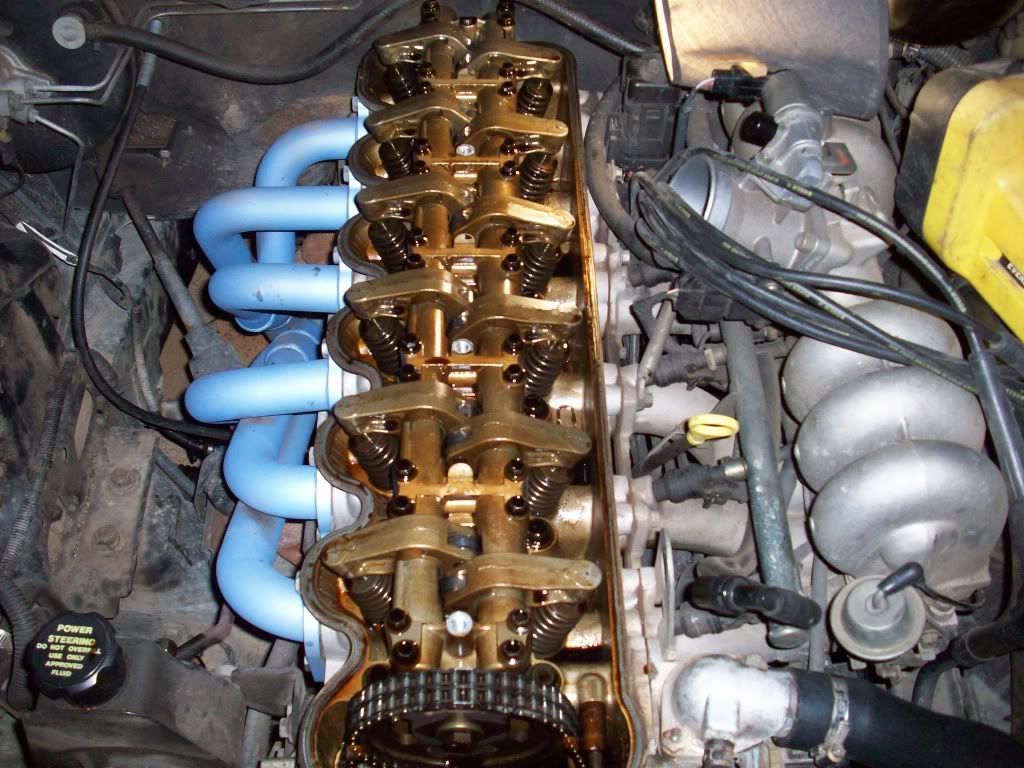
Undo the 4 nuts holding the rocker cover on using the 13 mm socket. Push the brake booster hose out of the way and remove the rocker cover. The rocker cover may be sealed on tight so use a screw driver and the small hammer to wedge in between the rocker cover and the gasket. Be careful not to damage the top of the cylinder head. Once the seal is broken you need to remove the cover it can be quite tricky so be patient.
Your engine bay should now look something like this.
Step 3
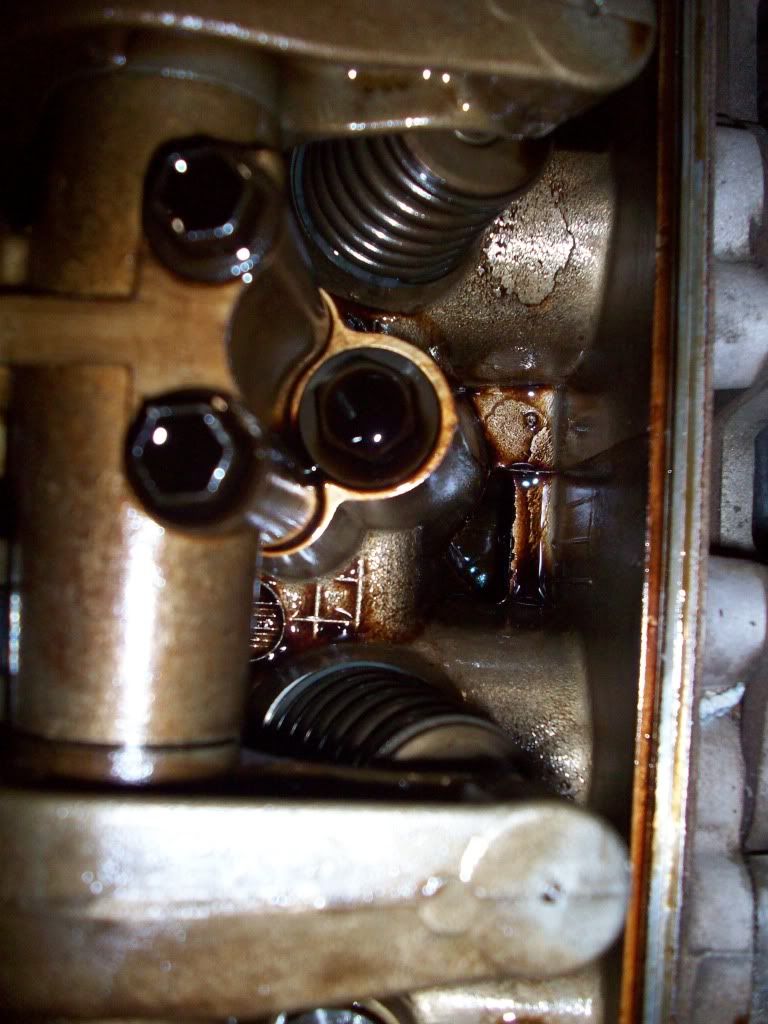
Rotate the motor using the 22mm socket on the harmonic balancer bolt until one of the no 6 cylinder rockers is rocking. Now get 4 pieces of lint free cloth and jam them into the oil holes so when the rockers are removed no pieces which may fall off can go into the sump. Source a cable tie and zip it on to the cam gear and chain so it doesn’t move. You must now only crack the cam bolt to avoid difficulty later on. Use the 17mm socket and a breaker bar and just give it a sharp quick hit with the palm of your hand to break the seal.
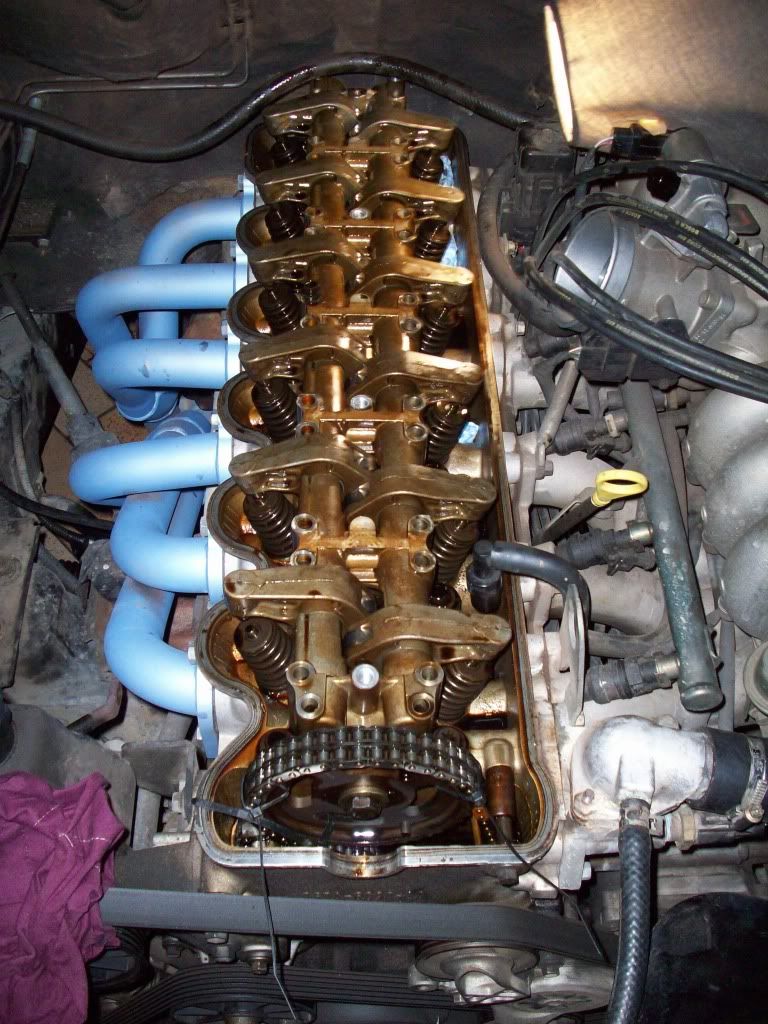
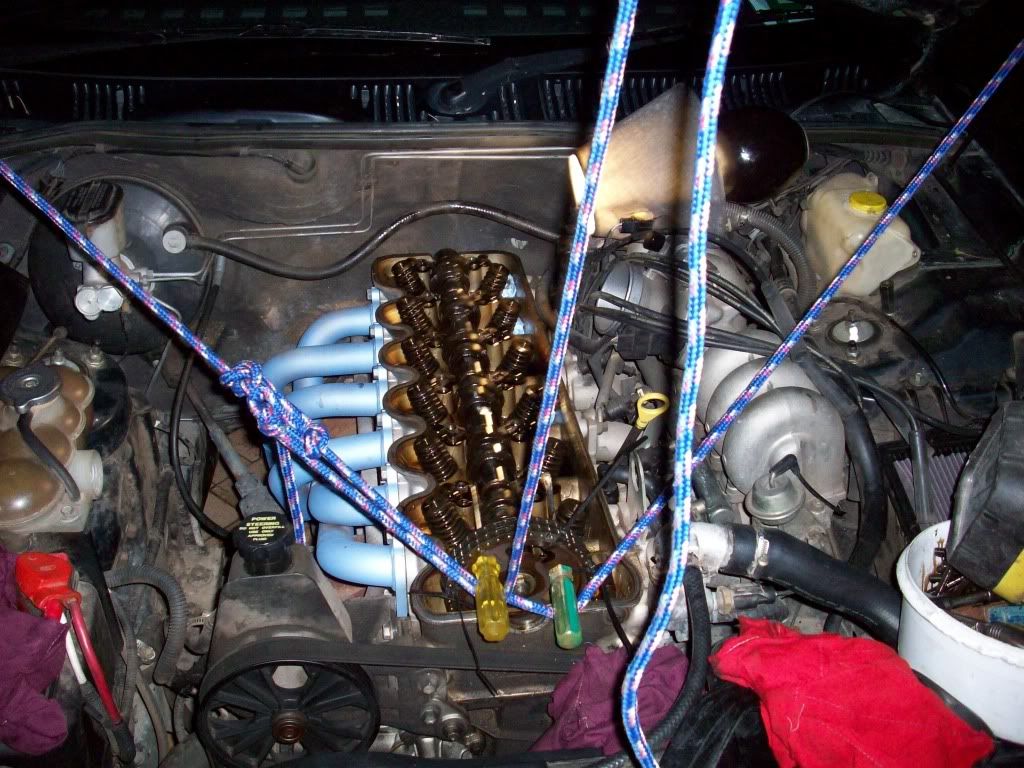
Now remove the rockers bolts one full turn at a time working from the ends in using the 10mm socket. repeat this until all tension is relieved then remove the rockers.
Your engine bay should look something like this now.
Step 4
Now source another camshaft or get yours re ground, and oil the camshaft journals. I’m using an ultra low Km EF unit.
Heres mine.
Step 5
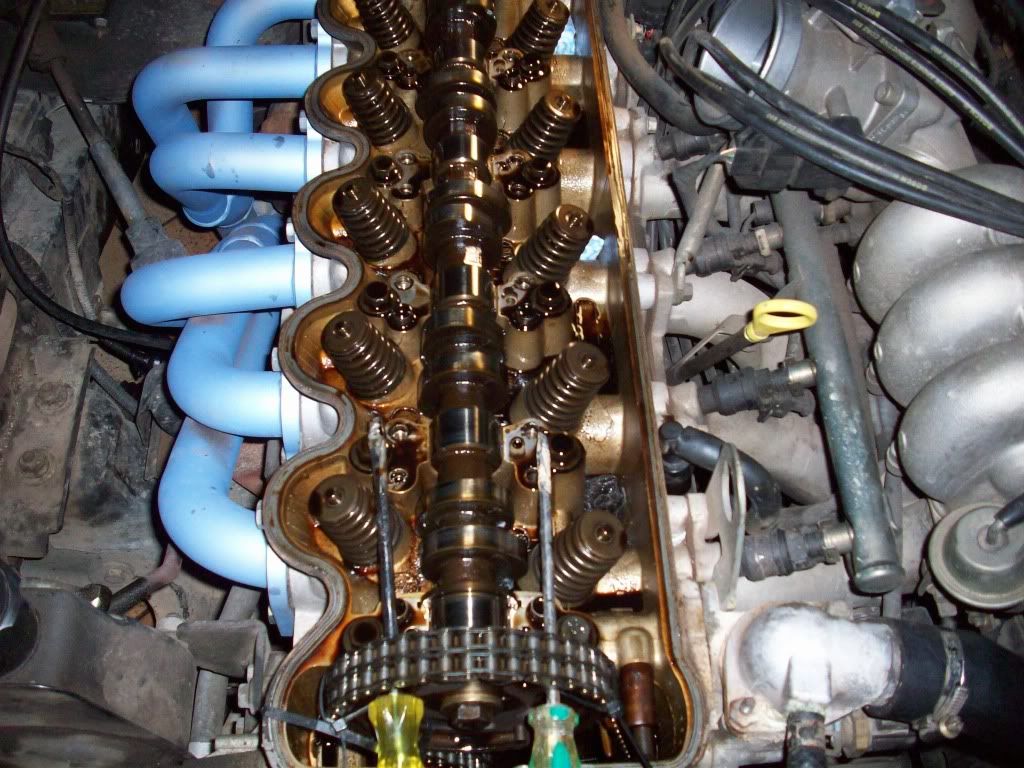
Once your new cam is ready remove the old one. Get someone to use a shaft in between the holes on the cam gear to provide enough tension on it so the chain tensioner doesn’t spring out causing it to be too tight later on. Remove the bolt and tap the gear off gently with a small hammer. remove the old cam and insert new one. line up the dowel pin on the gear with the slot in the cam and tap the cam gear back on to the cam, apply some loctite to the end threads on the cam bolt and tighten it to finger tight. Your assistant can now remove the shaft from the cam gear holes. You must now tighten the cam bolt to 50 Nm. Use a large screwdriver and a rag to slot in a cam gear hole to stop it from rotating when tensioning it.
Should look something like this now
Step 6
Now re install your rockers. This time work from the middle bolts out in a clockwise direction. Do them up finger tight first then one turn at a time until all bolts no longer become soft to turn meaning its fully down but not overly tight. Now use the tension wrench and tighten each one to 25 Nm working from the middle out again. Once this is done quickly go over each bolt on the same tension to guarantee each bolt is tight. Once this is done rotate the motor a few times on the harmonic balancer bolt to make sure it turns nicely and nothing hits. Line up the timing mark on the harmonic balancer to TDC and make sure the line in the cam gear is about 3mm above the top surface of the head. if it’s way off rotate the crank 1 full turn again. this is just to make sure the timing chain hasn’t slipped a tooth. Don’t forget to remove the 4 pieces of cloth too.
Step7
Now is a good time to paint your rocker cover if you wish, I decided to put a Tickford one on and swapped my PCV valve and lead holders from my original cover to my new one. you will need a 7mm to remove the lead holders. also get a new PCV valve rubber from ford.
here’s mine.
Step 8
Clean up your rocker cover gasket surface removing all old dirt and silicon. Install you new gasket with a bead of silicon around the half moons (EA-ED only). I used a one piece rubber one as it is less prone to leaks. Now bolt your rocker cover back on. Tighten the bolts to 6 Nm working from middle outwards.
Should look like this now.
Step 9
Clean up the engine bay a bit if you want. I used some Orange Force Spray and Wipe stuff, works great. Re install all hoses, cables, sparkplugs etc.
Final product should look like this now.
Step 10
Start it up and take it for a drive. Now be glad that you’ve saved your self heaps of $$$ by not taking it to a mechanic to get it fitted. its easy to do it yourself if you have a bit of knowledge and the right tools.
By John_xr6
Pictures will be up as soon as the server is ready Wink
---------------------------------------------------------------------------------
NOTE: The E-Series Owners Club and the writers of the articles take no responsibility for any damage or problems or grief that may be a result of following one of our articles. Make sure you know what you are doing, are confident and competent before commencing any activity. You do so at your own risk!
----------------------------------------------------------------------------------
Tools Required
Torque Wrench
Ratchet
Breaker Bar
7mm socket (if changing rocker covers)
10mm socket
13mm socket
17mm socket
22mm socket
Spark plug socket
Various extension bars
Screw driver
Small hammer
Shifter
Step 1
Remove all things which cross over the rocker cover and which go on it. These include: Sparkplug leads, Accelerator Cable, Cruise Control Cable(if fitted), PCV Valve Hose and Manifold Vacuum Hose (back of rocker cover) I also removed the sparkplugs, Brake booster hose and the Air Box.
Step 2
Undo the 4 nuts holding the rocker cover on using the 13 mm socket. Push the brake booster hose out of the way and remove the rocker cover. The rocker cover may be sealed on tight so use a screw driver and the small hammer to wedge in between the rocker cover and the gasket. Be careful not to damage the top of the cylinder head. Once the seal is broken you need to remove the cover it can be quite tricky so be patient.
Your engine bay should now look something like this.
Step 3
Rotate the motor using the 22mm socket on the harmonic balancer bolt until one of the no 6 cylinder rockers is rocking. Now get 4 pieces of lint free cloth and jam them into the oil holes so when the rockers are removed no pieces which may fall off can go into the sump. Source a cable tie and zip it on to the cam gear and chain so it doesn’t move. You must now only crack the cam bolt to avoid difficulty later on. Use the 17mm socket and a breaker bar and just give it a sharp quick hit with the palm of your hand to break the seal.
Now remove the rockers bolts one full turn at a time working from the ends in using the 10mm socket. repeat this until all tension is relieved then remove the rockers.
Your engine bay should look something like this now.
Step 4
Now source another camshaft or get yours re ground, and oil the camshaft journals. I’m using an ultra low Km EF unit.
Heres mine.
Step 5
Once your new cam is ready remove the old one. Get someone to use a shaft in between the holes on the cam gear to provide enough tension on it so the chain tensioner doesn’t spring out causing it to be too tight later on. Remove the bolt and tap the gear off gently with a small hammer. remove the old cam and insert new one. line up the dowel pin on the gear with the slot in the cam and tap the cam gear back on to the cam, apply some loctite to the end threads on the cam bolt and tighten it to finger tight. Your assistant can now remove the shaft from the cam gear holes. You must now tighten the cam bolt to 50 Nm. Use a large screwdriver and a rag to slot in a cam gear hole to stop it from rotating when tensioning it.
Should look something like this now
Step 6
Now re install your rockers. This time work from the middle bolts out in a clockwise direction. Do them up finger tight first then one turn at a time until all bolts no longer become soft to turn meaning its fully down but not overly tight. Now use the tension wrench and tighten each one to 25 Nm working from the middle out again. Once this is done quickly go over each bolt on the same tension to guarantee each bolt is tight. Once this is done rotate the motor a few times on the harmonic balancer bolt to make sure it turns nicely and nothing hits. Line up the timing mark on the harmonic balancer to TDC and make sure the line in the cam gear is about 3mm above the top surface of the head. if it’s way off rotate the crank 1 full turn again. this is just to make sure the timing chain hasn’t slipped a tooth. Don’t forget to remove the 4 pieces of cloth too.
Step7
Now is a good time to paint your rocker cover if you wish, I decided to put a Tickford one on and swapped my PCV valve and lead holders from my original cover to my new one. you will need a 7mm to remove the lead holders. also get a new PCV valve rubber from ford.
here’s mine.
Step 8
Clean up your rocker cover gasket surface removing all old dirt and silicon. Install you new gasket with a bead of silicon around the half moons (EA-ED only). I used a one piece rubber one as it is less prone to leaks. Now bolt your rocker cover back on. Tighten the bolts to 6 Nm working from middle outwards.
Should look like this now.
Step 9
Clean up the engine bay a bit if you want. I used some Orange Force Spray and Wipe stuff, works great. Re install all hoses, cables, sparkplugs etc.
Final product should look like this now.
Step 10
Start it up and take it for a drive. Now be glad that you’ve saved your self heaps of $$$ by not taking it to a mechanic to get it fitted. its easy to do it yourself if you have a bit of knowledge and the right tools.