Adding Thermofans to your EA/EB/ED
By Neb
NOTE: The E-Series Owners Club and the writers of the articles take no responsibility for any damage or problems or grief that may be a result of following one of our articles. Make sure you know what you are doing, are confident and competent before commencing any activity. You do so at your own risk!
This is a popular mod that alot of people are starting to do and is a relatively easy modification that most people will be able to do themselves.
Advantages
Less fan noise coming from the engine bay (no more noisy clutch fan!).
Less stress on the engine having to push a big clutch fan.
Possible improved fuel economy (I havn't noticed if its improved or not, my engine has been running really poor fuel wise (this started before the thermo fan conversion)).
Engine gets to operating temperature quicker (less engine wear).
More control over engine temperature - you can set what temperature the fans turn on
Improved cooling
And my favourite... The engine revs quite a bit easier and possibly more power? I don't know if more power has been proven but definately revs easier/quicker.
Disadvantages
More load on battery/alternator (although this hasn't caused any problems for me, just when the car is sitting still at traffic lights etc, the battery needle drops a bit).
Fan noise, The EL thermo fans can actually make a bit of noise when they're on, but still alot quieter than the clutch fan. I think aftermarket fans would be quieter but more work to mount properly
Tools32mm (6cyl) or 36mm (8cyl) sized spanner or try your luck with a shifter to remove clutch fan
Water pump securing tool or big flathead screwdriver
A set of spanners and screwdrivers may come in handy
Crimping Tool
Wire Cutter/Stripper
Drill (you may need a drill to mount the Thermatic Switch but it does come with self tapping screws)
Parts
EL Thermo Fans (and bolts)
Davies Craig Thermatic Switch
Relay 12v 4pin 40amp (pins 85, 87, 86, 30)
Blade Fuse Holder
Blade Fuse 30amp
Female Blade Connectors 2.5mm-3mm
Ring Terminal Connector
Wire (I used twin core 10amp red black trace fig8 (easier to wire))
Coolant (to top up radiator)
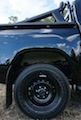
Removal of the clutch fan
1. Detach fan shroud retaining screws from the radiator (the fan shroud will then be loose and you can move it around).
2.Detach air box intake snorkel and battery snorkel then remove them from the vehicle.
3.Unscrew the large clutch fan nut with your spanner or shifter (left hand thread for 6 cylinders). If you have a water pump securing tool i'm sure it would make this alot easier, otherwise use a large flathead spanner and jam it in between the smaller nuts to try and hold the water pump still. I managed to wedge it between the water pump nuts and the powersteering pump. The clutch fan nut can be quite hard to loosen but keep trying different positions until you can get a good grip and the waterpump still and you should be able to get it.
4.You can now remove the fan/clutch and shroud from the vehicle!
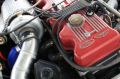
Installing the Thermo Fans (EL Thermo Fans)
1.Slide the thermo fans down against the inside of the radiator, it should rest comfortably in the bottom.
2.Bolt the thermo fans to the top of the radiator with the original thermo fan bolts. You will need a nut for it to screw in to, and may need some washers to pack it out slightly if the bolt is too long.
Installing the Davies Craig Thermatic Switch
1.Follow the instructions provided with the thermatic switch, they are much more detailed than these instructions.
Undo the top radiator hose (at the radiator end) and let any coolant flow out.
2.Carefully unwind the copper wire on the thermatic switch and bend into a suitable shape to go from the mounting point of the thermatic switch into the radiator hose.
3.Mount the thermatic switch. I mounted it just infront of the airbox. The kit contains self tapping screws for a secure fit, but you may need to use a drill. When mounting keep in mind of putting it somewhere out of the way but also easy to reach for adjusting it.
4.Place the copper wire sensor into the radiator hose. Use the small piece of rubber provided to make a better seal. Do the radiator hose up fairly tight. You might have to use some silicone or some kind of sealant if the hose leaks.
Follow the wiring diagram provided with the Davies Craig thermatic switch
I used the second wiring diagram (Twin Fans, Thermatic Only). But it may be different for you, i.e. if you're only using one fan or if you wish to hook it up to your air conditioner you will have to follow a different diagram and may need more or less wiring parts.
Use female blade connectors to connect to the thermatic switch, the thermo fan socket and the relays.
1.Run a single wire from an ignition source to the thermatic switch (I used the same wire that the head unit uses for ignition).
2.Decide where you are going to mount/hide your relays and run two wires from the thermatic switch (one wire to the 86 pin on one relay, the second wire to the 86 pin on the second relay).
3.Run two wires from one relay to the first thermo fan. The 85 pin on the relay is negative, 87 pin is positive.
4.Repeat for the second relay (ie. wires from the same pins, to the second thermo fan).
5.Each 85 pin wire also needs to be earthed, Earth either somewhere on the body or to the negative of the battery.
6.Run a wire from the 30 pin on the relay to a fuse holder and a wire from the fuse holder to the positive on the battery (use the ring terminals to connect to the battery). Repeat for the second relay.
7.Put a 30amp fuse in to each fuse holder.
8.Secure all the wiring (cable ties work ok), and Relays and Fuse Holders.
Settings
1.Before you do anything top the coolant up to the correct level, and put the airbox and battery snorkel back in.
2.Turn the adjusting nob on the davies craig thermatic switch all the way anti-clockwise, You should hear a click.
3.Now start the car. The thermo fans should come on straight away. If not you have done something wrong and better check over your wiring.
4.If the thermo fans are running, have a quick look to make sure they are turning the right way. If they aren't swap the positive and negative wires around.
5.Now rotate the nob on the thermatic switch back clockwise all of the way. The fans will turn off.
6.Wait for the car to get just above the normal operating temperature then rotate the nob on the thermatic switch anti-clockwise slowly until the fans come on
7.Play around with adjusting the temperature setting on the thermatic switch until you're happy with it. The fans should not be coming on too often. Davies craig suggest that the fans should run between 30-60 seconds at a time. My thermo fans only seem to run when the car is stationery, not very often do they run when the car is moving.
Completion
Congratulations, If you've gotten this far you have hopefully installed the thermo fans without any problems!
Now over the next couple of weeks, keep an eye on your temperature guage. Make sure the engine isn't getting too hot. Adjust the thermatic switch if you think the fans are coming on too often, or if they aren't coming on soon enough. Also if you need the fans to come on alot to keep the car cool, I would suggest flushing your radiator out, and if that doesn't work get it checked by a professional.
I also suggest sealing up the relays and fuses to keep them away from any water. I bought a small black plastic box from jaycar electronics and sealed them in that. You just need to cut a hole for the wires to go through, and then tape up all the gaps to keep it waterproof.
Thats it! I hope you enjoy the conversion. Feel free to post any feedback, If you think this website was helpful or if you think that anything needs improvement let me know. Thanks! Very Happy
Thermofan Conversion
26 posts
• Page 1 of 1
Thermofan Conversion
![]() by EFFalcon » December 14th, 2007, 10:01 am
by EFFalcon » December 14th, 2007, 10:01 am
1995 Falcon GLi | 1997 EL GT | 1995 Falcon Futura | 1983 Thunderbird Heritage | 2003 Fairmont Ghia
-

EFFalcon - Site Admin

- Posts: 14797
- Joined: June 4th, 2007, 8:26 pm
- Location: Carrum Downs
- Has Liked: 26 times
- Been Liked: 766 times
1995 Ford Falcon
Re: Thermofan Conversion
![]() by burnt turtle » January 26th, 2008, 5:48 pm
by burnt turtle » January 26th, 2008, 5:48 pm
i did this b4 i red this thread and i suggest 2 seal the thermostatic switch aswell.

-
burnt turtle - Full Boost
- Posts: 2211
- Joined: January 17th, 2008, 10:05 am
- Location: outside your window
- Has Liked: 62 times
- Been Liked: 10 times
2003 Ford Fairlane
Re: Thermofan Conversion
![]() by Amon » January 28th, 2008, 7:07 pm
by Amon » January 28th, 2008, 7:07 pm
y is that u got water or sumshit in ur switch??
Beef or chicken ming mongs
-

Amon - Breaking Traction
- Posts: 1426
- Joined: October 16th, 2007, 12:23 pm
- Location: Eastern Suburbs, Melbourne
- Has Liked: 0 time
- Been Liked: 2 times
1994 Ford XR6
Re: Thermofan Conversion
![]() by Commando » January 28th, 2008, 7:39 pm
by Commando » January 28th, 2008, 7:39 pm
Yeah, because if your top hose leaks under pressure it can piss a little coolant out behind the LHS headlight. If your switch/fuses are there and "exposed" rather than sealed, the coolant can cause them to short. Like mine did 
Previous: 1982 XE GL 3.3: 5 speed | 1991 EB Ghia 5.0: Vortech, Tiptronic, 4.11s, 232rwkw | 1995 EF GLi 4.0 wagon: LPG | 2006 BF Fairmont 4.0: JTG LiLPG
Now: 2016 Hilux SR HiRider
Now: 2016 Hilux SR HiRider
-
Commando - Moderator

- Posts: 11559
- Joined: July 13th, 2007, 12:08 pm
- Location: Stradbrokeback
- Has Liked: 110 times
- Been Liked: 516 times
2006 Ford Fairmont
Re: Thermofan Conversion
![]() by burnt turtle » January 29th, 2008, 5:30 pm
by burnt turtle » January 29th, 2008, 5:30 pm
my dads leaked coolant into the switch but i think mine got dirt in it or sumps stopped workin i pulled it apart cleaned the contact and it works fine now, mines mounted on rh side of engine bay out of way of collant gettin in!
-
burnt turtle - Full Boost
- Posts: 2211
- Joined: January 17th, 2008, 10:05 am
- Location: outside your window
- Has Liked: 62 times
- Been Liked: 10 times
2003 Ford Fairlane
Re: Thermofan Conversion
![]() by Bazza J » December 3rd, 2008, 6:20 pm
by Bazza J » December 3rd, 2008, 6:20 pm
dam clutch fans, i busted 2 large screwdrivers 2day tring 2 remove the thing, i've tried using a hammer on the spanner, and it still doesnt want to move, is there another way to remove it????
thanks
thanks
Daily:1993 Toyota 4 Runner, 5 speed Manual, 2.8L N/A diesel
Project: Ford 1976 ZH Fairlane Marquis 351 Clevo & C4 shiftkitted auto - in the build
Project: Ford 1976 ZH Fairlane Marquis 351 Clevo & C4 shiftkitted auto - in the build
-
Bazza J - Cruising
- Posts: 400
- Joined: February 1st, 2008, 7:00 pm
- Location: Tamworth NSW
- Has Liked: 0 time
- Been Liked: 0 time
Re: Thermofan Conversion
![]() by Commando » December 3rd, 2008, 6:47 pm
by Commando » December 3rd, 2008, 6:47 pm
Which way are you trying to undo it?
Previous: 1982 XE GL 3.3: 5 speed | 1991 EB Ghia 5.0: Vortech, Tiptronic, 4.11s, 232rwkw | 1995 EF GLi 4.0 wagon: LPG | 2006 BF Fairmont 4.0: JTG LiLPG
Now: 2016 Hilux SR HiRider
Now: 2016 Hilux SR HiRider
-
Commando - Moderator
- Posts: 11559
- Joined: July 13th, 2007, 12:08 pm
- Location: Stradbrokeback
- Has Liked: 110 times
- Been Liked: 516 times
2006 Ford Fairmont
Re: Thermofan Conversion
![]() by Bazza J » December 3rd, 2008, 6:57 pm
by Bazza J » December 3rd, 2008, 6:57 pm
i broke the 1st screwdriver trying towards the battery and the 2nd away
Daily:1993 Toyota 4 Runner, 5 speed Manual, 2.8L N/A diesel
Project: Ford 1976 ZH Fairlane Marquis 351 Clevo & C4 shiftkitted auto - in the build
Project: Ford 1976 ZH Fairlane Marquis 351 Clevo & C4 shiftkitted auto - in the build
-
Bazza J - Cruising
- Posts: 400
- Joined: February 1st, 2008, 7:00 pm
- Location: Tamworth NSW
- Has Liked: 0 time
- Been Liked: 0 time
Re: Thermofan Conversion
![]() by Malakai » December 3rd, 2008, 7:04 pm
by Malakai » December 3rd, 2008, 7:04 pm
I have recently done this on my EA. I nearly busted a screw driver trying to get the clutch fan off. I decided to spray the big nut that screws the clutch fan onto the thread with WD40 and leave it for half and hour. I came back and it came off very easily. I was expecting some fight to be left in it still but it collapsed like a house of cards. WD40 FTW!
FG G6E Turbo MkII - Nizpro Stage 3 - 364 rwkW - 11.63 sec @ 118 mp/h | I like the dark, I love the dark, but I hate nature. 
-

Malakai - Double Clutching
- Posts: 5251
- Joined: July 21st, 2007, 1:23 pm
- Location: Brisbane
- Has Liked: 0 time
- Been Liked: 32 times
Re: Thermofan Conversion
![]() by Bazza J » December 3rd, 2008, 7:24 pm
by Bazza J » December 3rd, 2008, 7:24 pm
i tried a bit of that 2, i might spray a heap on saturday arvo and have another go, thanks for the help guys
Daily:1993 Toyota 4 Runner, 5 speed Manual, 2.8L N/A diesel
Project: Ford 1976 ZH Fairlane Marquis 351 Clevo & C4 shiftkitted auto - in the build
Project: Ford 1976 ZH Fairlane Marquis 351 Clevo & C4 shiftkitted auto - in the build
-
Bazza J - Cruising
- Posts: 400
- Joined: February 1st, 2008, 7:00 pm
- Location: Tamworth NSW
- Has Liked: 0 time
- Been Liked: 0 time
Re: Thermofan Conversion
![]() by e series falcon » December 3rd, 2008, 8:05 pm
by e series falcon » December 3rd, 2008, 8:05 pm
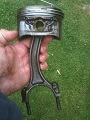
hey guys my dad had a tool made up to take off clutch fans on x series and it works on e series it is the best no pissin around can show piks if want
ed futura

-

e series falcon - Spooling Up
- Posts: 655
- Joined: March 2nd, 2008, 7:22 am
- Location: gold coast
- Has Liked: 3 times
- Been Liked: 0 time
Re: Thermofan Conversion
![]() by Malakai » December 3rd, 2008, 9:20 pm
by Malakai » December 3rd, 2008, 9:20 pm
The manual I have has a template with the measurements for making one, could follow that I suppose.
FG G6E Turbo MkII - Nizpro Stage 3 - 364 rwkW - 11.63 sec @ 118 mp/h | I like the dark, I love the dark, but I hate nature.
-
Malakai - Double Clutching
- Posts: 5251
- Joined: July 21st, 2007, 1:23 pm
- Location: Brisbane
- Has Liked: 0 time
- Been Liked: 32 times
Re: Thermofan Conversion
![]() by 2E's » December 18th, 2008, 9:40 pm
by 2E's » December 18th, 2008, 9:40 pm
i will have to do this with the new thermos i have
-

2E's - Idling
- Posts: 69
- Joined: December 12th, 2008, 8:01 pm
- Location: Melton, Victoria
- Has Liked: 0 time
- Been Liked: 0 time
Re: Thermofan Conversion
![]() by 2E's » December 18th, 2008, 9:45 pm
by 2E's » December 18th, 2008, 9:45 pm
i will have to do this with the new thermos i have
-
2E's - Idling
- Posts: 69
- Joined: December 12th, 2008, 8:01 pm
- Location: Melton, Victoria
- Has Liked: 0 time
- Been Liked: 0 time
Re: Thermofan Conversion
![]() by G.EB » November 17th, 2010, 5:07 pm
by G.EB » November 17th, 2010, 5:07 pm
What type of Davies Craig switch? And where from?
Cheers
Cheers
Cruisin' in:
2010 D22 Navara ST-R daily
93' ED fmont original 95000 km
69' XW fmont work in progress
2010 D22 Navara ST-R daily
93' ED fmont original 95000 km
69' XW fmont work in progress
-

G.EB - Idling
- Posts: 74
- Joined: February 21st, 2010, 8:12 pm
- Location: Gippsland
- Has Liked: 0 time
- Been Liked: 2 times
Re: Thermofan Conversion
![]() by [D1SCNT] » November 21st, 2010, 11:33 pm
by [D1SCNT] » November 21st, 2010, 11:33 pm
i tryed getting a davies craig from repco in oakleigh the other day and they told me they dont carry them any more, only had a brand called iCE. so i got it.
did this in the ED but the fans are both on once you click to ignition, cant get them to switch off. try'd swapping ignition from switch to relay and other way around it doesn't make a difference.
also doesn't matter if i rotate the switch clock wise or anti they still just stay on:P
did this in the ED but the fans are both on once you click to ignition, cant get them to switch off. try'd swapping ignition from switch to relay and other way around it doesn't make a difference.
also doesn't matter if i rotate the switch clock wise or anti they still just stay on:P
Re: Thermofan Conversion
![]() by CAGS » November 22nd, 2010, 6:25 am
by CAGS » November 22nd, 2010, 6:25 am
I got a Davies Craig Thermal Switch and Relay kit (Part No 04040) from Supercheap the other day, think it was around $65. You could also try Tuff Car Parts.
XG Panelvan
-

CAGS - Cruising
- Posts: 211
- Joined: September 8th, 2010, 3:14 pm
- Has Liked: 12 times
- Been Liked: 9 times
Re: Thermofan Conversion
![]() by sexyr6 » November 22nd, 2010, 7:43 am
by sexyr6 » November 22nd, 2010, 7:43 am
you may find this helpfull.. Here
Daily Driver - 92 EBII Fairmont Wagon, 347.
The Tow Rig - 81 F100 SWB 351c
The Toy - 94 ED XR6 5spd Turbo.

seXyR6's Build Thread
seXyR6's Garage
EBW-347 Build Thread
EBW-347 Garage
81 F100 Showroom
The Tow Rig - 81 F100 SWB 351c
The Toy - 94 ED XR6 5spd Turbo.
seXyR6's Build Thread
seXyR6's Garage
EBW-347 Build Thread
EBW-347 Garage
81 F100 Showroom
-
sexyr6 - Breaking Traction
- Posts: 1364
- Joined: October 17th, 2007, 5:56 pm
- Location: Mildura VIC
- Has Liked: 16 times
- Been Liked: 36 times
1994 Ford XR6 5spd
Re: Thermofan Conversion
![]() by [D1SCNT] » November 22nd, 2010, 5:28 pm
by [D1SCNT] » November 22nd, 2010, 5:28 pm
yer turn's out repco sold me a dud switch.
Re: Thermofan Conversion
![]() by needfordspeed » March 5th, 2011, 3:30 pm
by needfordspeed » March 5th, 2011, 3:30 pm
Thanks for the doco John, I followed this and they worked first shot.
But I got a question, does anyone know how to setup the relays for a negative trigger? I gotta do this to run my fans through the microtech.
But I got a question, does anyone know how to setup the relays for a negative trigger? I gotta do this to run my fans through the microtech.
1988 EA S-Pack - 10.6@125MPH New build underway
-

needfordspeed - Moderator
- Posts: 5256
- Joined: July 13th, 2007, 2:13 pm
- Has Liked: 110 times
- Been Liked: 417 times
1988 Ford S Pack
Re: Thermofan Conversion
![]() by Dansedgli » March 5th, 2011, 4:00 pm
by Dansedgli » March 5th, 2011, 4:00 pm
Battery to pins 85 and 87. Pin 30 to fans and Pin 86 to earth to turn them on.

-
Dansedgli - Melting Pistons
- Posts: 9734
- Joined: July 13th, 2007, 11:35 am
- Location: Melbourne
- Has Liked: 75 times
- Been Liked: 542 times
2001 Ford Falcon Ute

-

travs ea-xr6 - Full Boost
- Posts: 2979
- Joined: March 7th, 2008, 3:43 pm
- Location: Melbourne - Vic
- Has Liked: 17 times
- Been Liked: 8 times
Re: Thermofan Conversion
![]() by -fairmont- » September 23rd, 2012, 11:49 am
by -fairmont- » September 23rd, 2012, 11:49 am
Hi, I'm doing this conversion but not using the davies craig switch. what temp. sensor would I need to use?
Chargd wrote:dont worry mate, it isnt your fault your mum and dad share the same parents.
obsezd wrote:Never knew they allowed grandparents to keep dynos at the retirement village
Bipolar wrote:Basically I park assuming everyone else is retarded.
-

-fairmont- - Cruising
- Posts: 267
- Joined: October 15th, 2011, 6:31 pm
- Location: Hervey Bay, QLD
- Has Liked: 51 times
- Been Liked: 18 times
1990 Ford POS EA
Re: Thermofan Conversion
![]() by XR_Lightning » September 23rd, 2012, 8:46 pm
by XR_Lightning » September 23rd, 2012, 8:46 pm
You will need a thermatic switch, I use a Tridon one, Part Number is #TFS148, Thread: M16, Temp: 95 - 90 degrees celsius
The switch screws in the bottom thermostat housing where that orange blanking plug is, there are alot neater than having the ugly davies craig probe in the top radiator hose
The switch screws in the bottom thermostat housing where that orange blanking plug is, there are alot neater than having the ugly davies craig probe in the top radiator hose
ED XR6 - T5 - 1521a@112 - 3.9's - 170.2rwkw - POWERED BY METALLICA
-

XR_Lightning - Hitting N2O
- Posts: 3716
- Joined: July 23rd, 2007, 6:48 pm
- Location: Dandenong North
- Has Liked: 1076 times
- Been Liked: 487 times
1993 Ford ED Falcon XR6
26 posts
• Page 1 of 1
Who is online
Users browsing this forum: No registered users