---------------------------------------------------------------------------------
NOTE: The E-Series Owners Club and the writers of the articles take no responsibility for any damage or problems or grief that may be a result of following one of our articles. Make sure you know what you are doing, are confident and competent before commencing any activity. You do so at your own risk!
----------------------------------------------------------------------------------
This is a VERY broken down way of how to do a power window install the way that I did it. There is another way using aftermarket stuff here (http://fordmods.com/forums/documents.php?doc=21), but of course you cant add extra goodies afterwards with this way without additional cables such as the door lamps, and thats about it actually. But you cant add them without extra wiring. Remember that.
It explains hopefully everything so that a complete noob can nail it, first shot, no dramas. Experienced people will just have to sift through the stuff you already know, deal with it!
Please read everything first so that you have a clear understanding of what’s involved.
Special thanks go to John (EFFalcon) for support, being the go-to guy for me, and supplying the parts cheap. Also to Jimmy (ebgt302) for more parts sold cheap.
This is able to be done fronts only.
if you are after fronts only, and dont want the possibility of changing to all 4 later, then by all means take the body loom from a futura, XR, or other model with the specs you're after. Just bare in mind that different models have different looms, and thus require different switches in the front (centre console). Same process, just with no rear install and obviously 4 x less rivet nuts. You could also opt for Fairmont/Ghia, but dont install anything in the rears, just leave them winders. that would also work. I did this and there was about 4 weeks between fronts and rears. Fronts worked fine during this time.
Wagons and other LWB models i assume will be SLIGHTLY different in the positioning of the loom mounts etc, so pull it all from same car. sedans from sedans, wagons from wagons, and LWB from LWB.
I dare say that all you do is rather than pull everything out from an EF as i needed, pull from an EA, EB, ED, EL or appropriate N Series. Power window mechanism mounting points are all same for all E-Series.
Tools required:
Screwdriver – Phillips and normal
Hammer and centre punch of a sort
Power drill and 5mm drill bit (metal drilling)
Pop Riveter (depending)
Torque Keys
Socket wrench with socket set – metric
Others may be required for other models than EF. Mine’s EF, so I only know that one.
Bits and Pieces:
4 x power window mechanisms
Fairmont or Ghia body loom (Must be same model)
Door looms from Fairmont or Ghia (Must be same model)
Switches for centre console and rear doors.
8 x M6 rivet nuts part number V820134S from Ford
Rivets
A small length of cable – 40A rating. .5m is plenty.
Fairmont or Ghia door trims.
Rivets OR nut and bolt, no longer than 2cm.
Wire clip - available at any electric store. place 2 wires in, clamp down, instant elctrical connection. Pic to be added soon
Time
Swap over body loom - took me approx 7 hours start to finish.
Window mechanisms - from trim off to trim back on, allow between 30 and 120 mins depending on competency per door.
Door looms - bugger all, maybe 10 mins max.
Money
I managed this all for just over of $200. trims and all.
Cost break down -
Body loom - $20 from 'U Pull It' wrecker
window mechanisms - $20 ea. rears $40 ea. fronts.
Switch (centre console) - $40 ($80 at wrecker)
Door looms - free with mechanism ($20 ea from wrecker)
Cable 40A - $5 for 4 x more than needed, but that was minimum buy.
Door trims with rear switches - $30
M6 Rivet nuts - $27/$30 from Ford Spare Parts.
Hoenstly, don't expect yours to be as cheap, unless you really hunt around, or get lucky like i did. This can range up to about $700 depending on the price you pay for everything.
What’s What
If you’re anything like me, you’re wondering WTF is a body loom!!?? Door loom? WTF!?
Right, so here we explain a lil bit.
Body loom:
This piece of cable runs from the driver’s side right kick panel through to the rest of the car. It simply unplugs from its connections. It runs through to the driver side mirror, and door loom (will explain in a second). Also runs all the way down the driver’s side, plugs into the door button (the one that turns the interior light on when door is opened), continues down, over into the boot where first doubles back to hook into the rear demister and then back to the book where it hooks into speakers, tail lights, around to brake lights, across to fuel pump and fuel door release.
Door loom.
Much simpler, this one just connects to the body loom on one side, and the power locking actuator, and soon to be power windows as well as fronts connecting to the speakers.
Step 1.
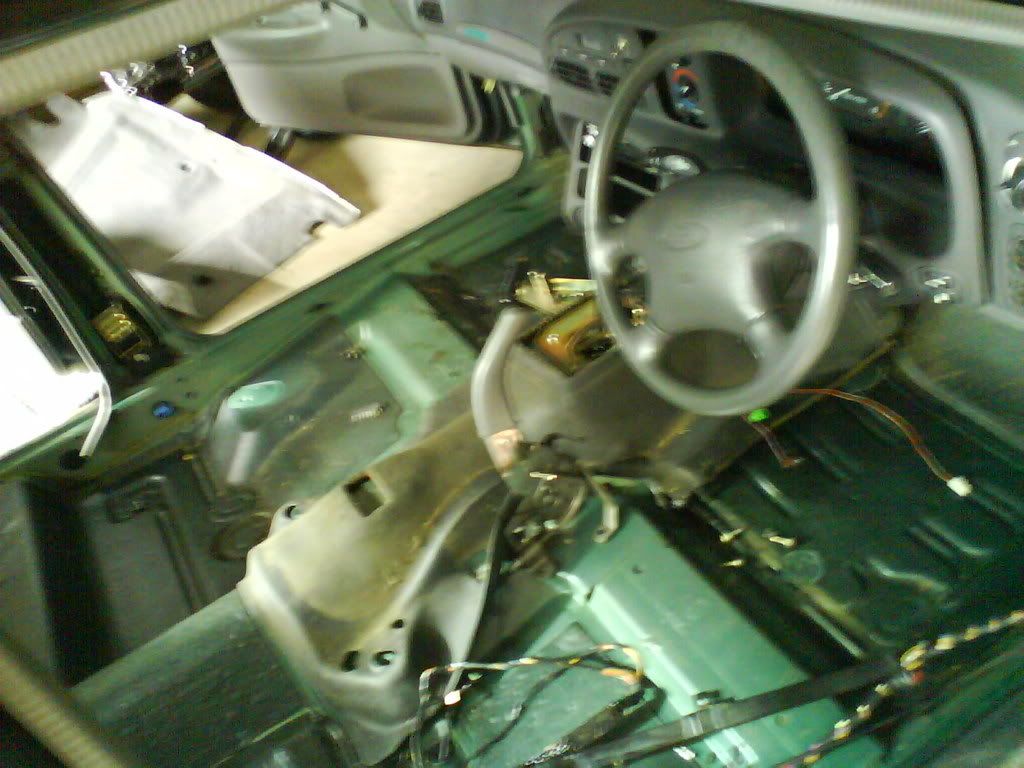
Remove EVERYTHING!
Firstly, for ease of not stuffing round here and there as you go along, do it all in one hit.
Remove the seats. Fronts come out with 4 bolts. Use your torque key to remove them by sliding the seats back to remove the front bolts, and forward for the rear bolts. The rears come out by folding down the backrests. Unbolt these (socket set) after you unhook the carpet that’s attached to the back of them. Once the back rests are out, push the base towards the tail of the car and up.
Next the centre console. There’s a number of screws holding in the dash, and while not required, I took it out to be 100% safe not to kill my centre console. Unscrew all of these, and the dash will just pull out. Make sure you unplug all the looms or it’ll never come free. Moving on to the centre console, start under the lid of it. There’s a few screws here. Just work your way along patiently until it all comes out. If you have an auto, the t-bar surround will need to come out. This is held in by 3 wedges that hold it in place. Jimmy it out with a flat head screw drivers being careful not to destroy it. You’ll also need to remove the t-bar itself. Just unscrew it and it’s gone.
Now that all of this is out, you need to be taking out the carpet. Remove kick panels, door rubber, unbolt seat belts and then just pull out the carpet.
Now as you’d think, out with the white plastic support for centre console. Just unscrew. Nice and easy. Once this is done, you’re seeing black rubber lying over the top of the wires. Unbolt the handbrake from the floor to remove this.
Step 2.
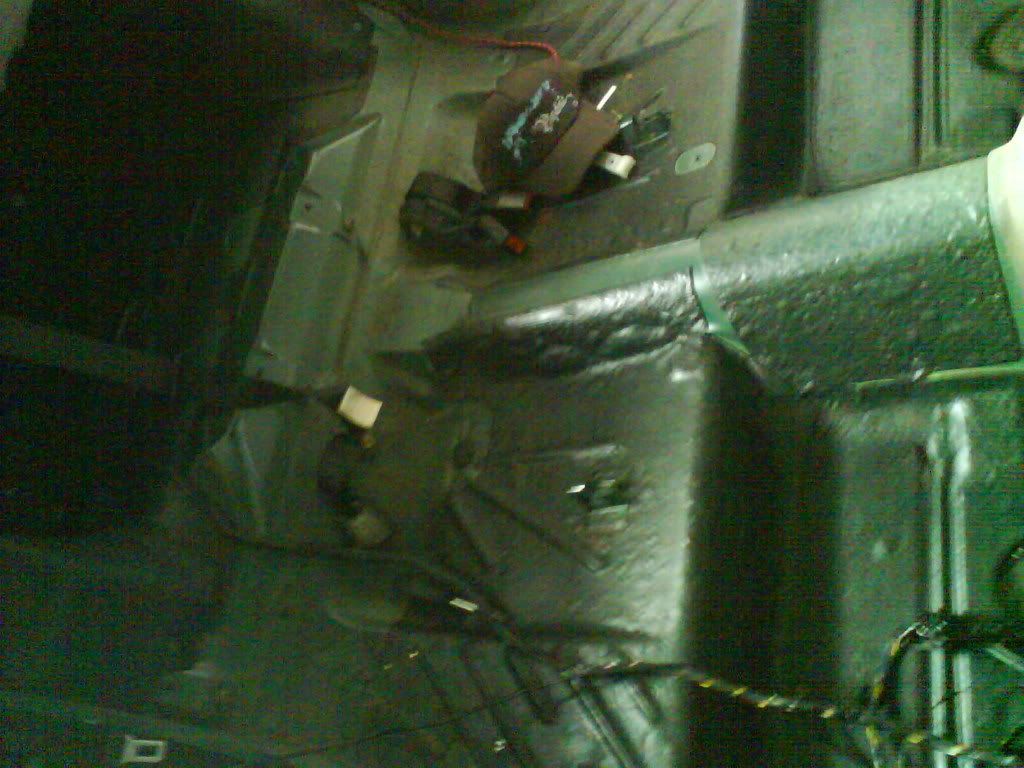
Remove Body Loom.
Now you car is all naked, just unplug that big lump of wires you can see. Unplug it from everywhere you see it. Remember, don’t CUT wires, this is BAD. Trust me on this one. This also goes into the passenger side repeater. I found that it was easier to attack that one from the wheel arch. Just unscrew and twist out the globe. Unplug it all and then throw it in the bin.
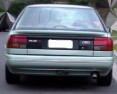
What your car now looks like (EF)
Step 3.
Replace with new Body Loom and re assemble.
Hook it all back together. Lights back in their spots, everything connected that was originally connected. Now, before carpet and all go back in, the power cable. This connects to the fuse block by stuffing the wire into the spot with PWR WDW on it. Whack a 30A fuse in and done there. The other end connects to the Grey/Yellow cable in the body loom. Make the cable hidden as you like, and then connect with the magic lil clamp thingy.
This is the only electrical work you need to do, and as you see, no soldering needed.
Now replace centre console (where there’s a new loom, drill a hole in the white bit big enough for the loom to fit through and feed it through), carpet, dash, and seats in the reverse order that you pulled them out. Piece of cake. Mmmmmmmm….cake….
When doing this, add your switches to the centre console (just held in by 2 screws) and attach the cables.
Remember to make sure everything will line up nicely before bolting everything back down only to realise you didn’t put items X, Y and Z in the 100% right spot and you have to re-do everything like 4 times. It takes a lot longer this way (again, trust me, I know)
Step 4.
The window mechanisms.
Remove door trim and speaker if present. Then remove the foam. Careful to minimise the tears you put in the foam, as it goes back on. Drivers door needs the power mirror loom unplugged (if optioned), so do that.
The set up in front of you (passenger door)
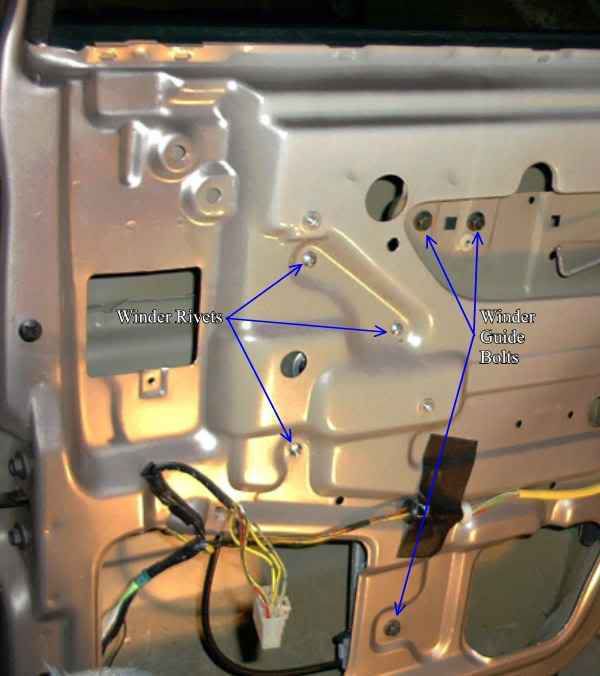
Punch out the centre piece of the rivets holding the winder mechanism in place. Drill out the rivets until the mechanism drops loose. Next unbolt your guide from the door and window.
-Important-
Make sure you have someone/some tape holding the window up. The last thing you want is for the window to drop and break as you are removing all of its support.
Feed this out from the door through the hole in the bottom **insert lols here**
Feed the new mechanism in and make sure the power bit is facing the right way for attachment. Re bolt the guide to the window, then to the door (is a Pain in the Ass!) Once this is done, use your bolts or rivets, whichever is your weapon of choice, and attach the mechanism to the door. It should align perfectly regardless of which model the winders are from and which model your car is, provided it’s all E-Series.
Spray a bit of silicone spray down the runners, that is, the black rubber either side of the window that the window runs through.
Step 5.
Door loom
The fronts and backs are different, so first, front:
The rubber between the door and body when it’s open? It has a use! That’s the door loom and that’s what you’re pulling out. It’s attached to the body loom, so unplug here, and replace with new one so you don’t lose the looms. Now pull out from the door. Just unplug everything it’s attached to and pull it out and this is now bin worthy too. Feed the new one back into the door and re-connect. You now should be able to use you power window without any ignition. Yay!
The rears:
Similarly, there is a rubber connection that goes to the door, and into the body. It runs down the door and into a lower section of the car. Just pull out, unplug, re-plug and replace rubber.
NOTE: your rears will NOT work until your switches are fitted.
Step 6.
Door trims.
If replacing EF trims with EL trims, you will need to slightly modify the way on which the trim attaches. 2 of the screws on the EF attach sideways, which is different to the rest of the screws and a small plastic piece was added for this. If you’re using EL trims, those screws fit the same as everything else and you’ll need to pull those plastic bits out. Brute force and a set of pliers works.
You will now need to fit your Fairmont/Ghia trims, and thus will need to fit the M6 rivet nuts for the trims to attach properly. This has been done by many by using a nut and bolt through the middle and tightening as it costs $$$$$$ for the actual tool.
I went somewhere that had the tool and paid $15 for them to do it for me. Easy as.
They need to be fitted to the following holes on each door.

Otherwise you’re all set. No need to remove the little bronze coloured piece either. It’s not in the way, so just leave it.
Step 7.
ENJOY!
Me personally, I felt so happy that I sat there and wound the windows up and down for a good 10-15 mins. Good times.
Hope all goes well.
Brenton